

How Do I Change The Batteries In My Blink Camera
Removing the Battery Encompass of Glimmer cameras
Select your camera
Blink Video Doorbell
The batteries and a QR lawmaking representing the Device Series Number (DSN), are plant inside the example of your Glimmer doorbell. The Blink Video Doorbell uses ii, size AA Lithium not-rechargeable batteries.
To modify batteries, follow the instructions to open up the case. If you accept a wired installation, disconnect power before removing the doorbell from its back plate. This is to protect you from possible electrical stupor by touching the exposed terminals.
Delete
Opening the Glimmer Video Doorbell Example
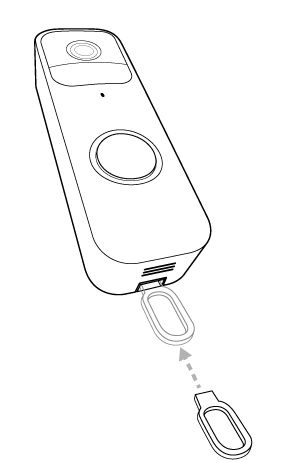
To remove the doorbell from its back plate, use the Opening Key that came taped to the newspaper template in the production box. If you need some other key, contact Blink support.
 Opening Key
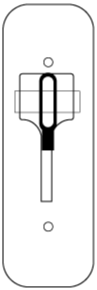
Put the key into the opening at the base of the Blink Video Doorbell.
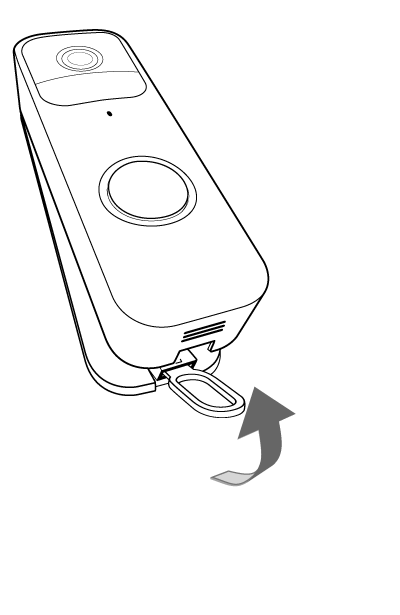
If your doorbell has a battery cover, and then removing information technology from the back plate is washed by pressing the cardinal straight into the slot until the grey catch is released.
If your doorbell has an open battery compartment, the latch is opened by pulling the key toward you slightly. When released, slide the doorbell up while pivoting abroad from the back plate.
Inside the battery example you can notice the QR lawmaking and corresponding Device Series Number (DSN), the reset push button, and a diagram shows the right position to insert new batteries.
There are two types of doorbell blueprint. One has an open battery bay, the other has a weather condition protective battery cover. They are shown below.
For the doorbell with a battery cover, press the grey release button to open, then lift it to remove. The battery cover provides conditions resistance, which is important to the doorbell working properly, and so keep it prophylactic when changing batteries.
Reconnecting the doorbell
If your doorbell has a battery cover, brand certain it is in place, and secured earlier reconnecting to the back plate. Align the height of the doorbell with the peak of the back plate so that the hook sets, then press the bottom confronting the back plate firmly until you experience and hear a click.
Connect the doorbell to the backplate by lining up the pins and using a ii pace motion - printing the doorbell against the backplate firmly (with moderate strength), so push down to line upwardly the lesser edges. Yous should experience a slight click when the doorbell is secure.
Press the doorbell button to examination it.
Delete
Outdoor and Indoor (gen two)
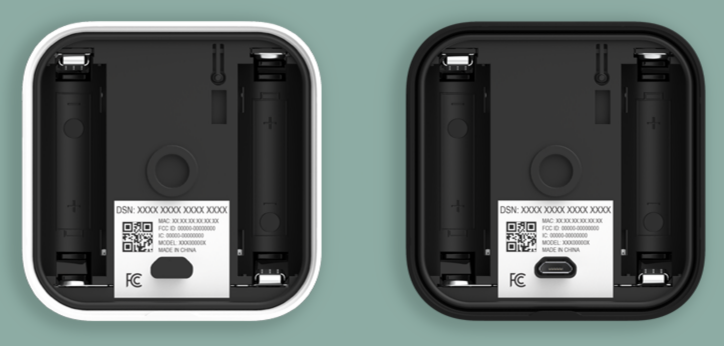
For Outdoor and Indoor (gen ii) cameras, the batteries and Device Serial Number (DSN) sticker are found inside the back cover. The serial number is needed to add a device to a system. For your convenience, we added a QR code version of the series number to scan with the Blink mobile app. Click to acquire about adding an Indoor (gen 2) or Outdoor camera to your system.
Before trying to remove the dorsum cover, you must remove the camera from any mounts or accessories. This includes any 3rd-party products.
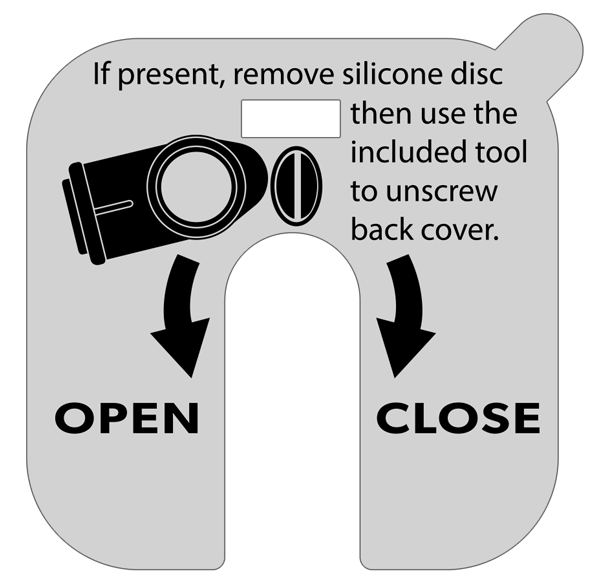
Your camera shipped with a silicone disc covering the screw that secures the back cover.

The screw slot allows you to employ the included opening tool/mount adapter unscrew the camera back. You tin can also use a coin, or flathead screwdriver.
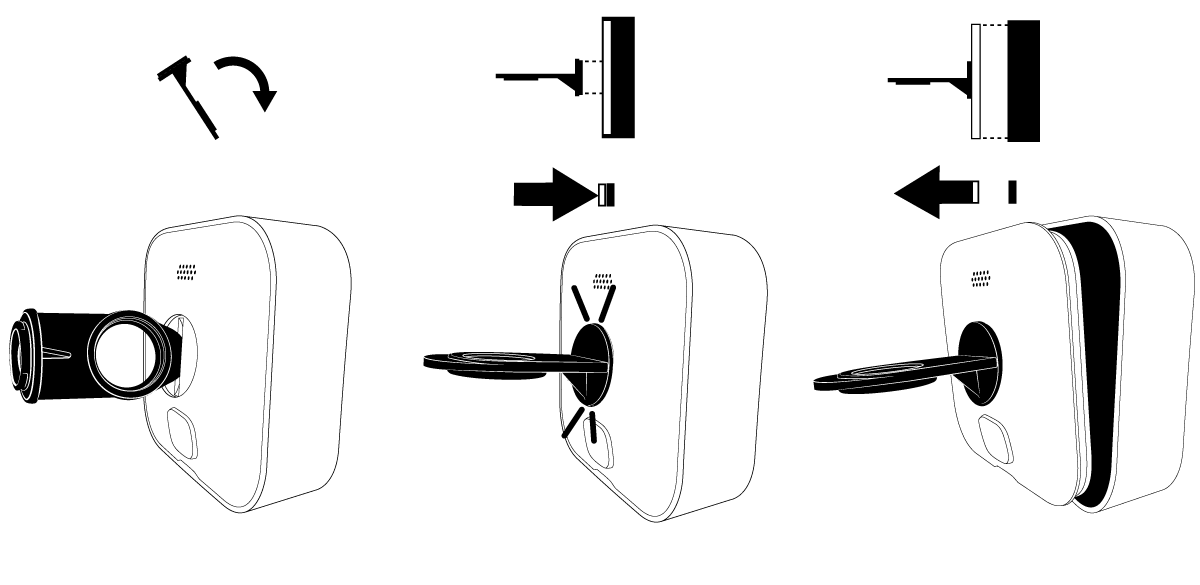
A plastic sticker on the back of the photographic camera shows the direction to turn. Plough left (counter clockwise) to open, and right (clockwise) to shut.
Remove the picture show before photographic camera use.
To remove the back cover and open up the camera
1. If it is present, remove the silicone protective embrace from the fastening spiral, and go on it for future use.
2. Use the included opening tool, to plough the screw counter-clockwise (turning to the left) until the spiral spins freely.
![]()
3. Apply side pressure on the opening tool to gently pry the encompass loose. Every bit shown in the analogy, be careful to hold the camera on its side, to allow the encompass to come off.
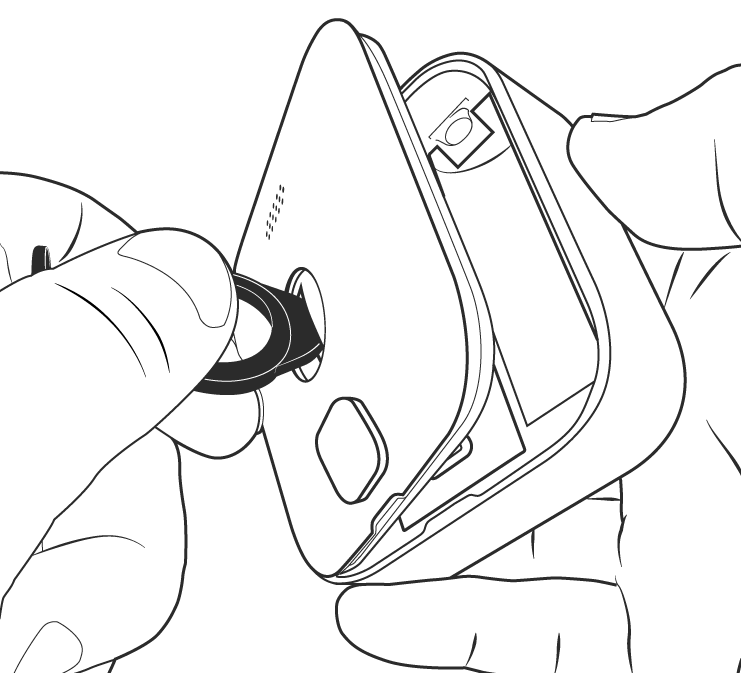
iii.a. (Accessibility) Another way to remove the back cover afterwards it is unscrewed completely, is to turn the opening tool around and insert the mounting end into the camera'south back cover (you will feel and hear a click when the mount is secured). Then, if y'all pull the opening tool gently, the camera'south back cover also comes off because the two are now fastened.
To secure the dorsum encompass and close the photographic camera
1. Align the guide notches as shown, and gently concord the cover in place against the camera torso.
2. Turn the screw clockwise (turning to the correct) approximately 3 turns, or until snug. Take intendance to prevent over-tightening. The comprehend should be flush with the photographic camera trunk when you lot are done.
![]()
Top of page
XT2 and XT
This commodity will show y'all how to remove the battery embrace from your new Glimmer XT photographic camera. You tin also watch a video on how to remove it by clicking here.
one. Hold the camera so that the back is facing you.

two. You'll notice a grey switch with an pointer facing toward the bottom of the camera. Slide and hold that in the direction of the arrow.

3. While doing this, pull up on the battery cover with your thumb. This may require some strength as the camera is air tight.

4. Lift the battery cover off of the photographic camera.

That'southward it, you can at present insert the batteries and access your camera'due south serial number (S/N).
Superlative of page
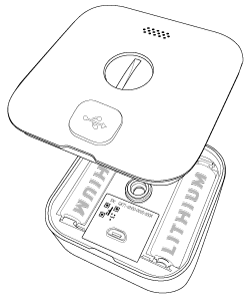
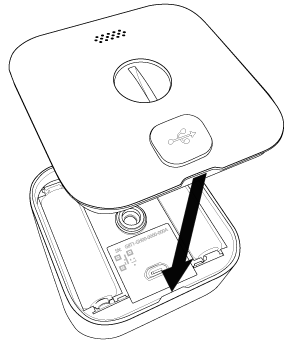
Indoor (gen ane)
The latch to remove the back encompass of the Indoor (gen 1) photographic camera is on the bottom. Slide the latch to release the battery cover.

Click here to acquire how to remove the battery cover from the Glimmer Indoor and Outdoor photographic camera.
The Blink Mini does not use batteries.
Source: https://support.blinkforhome.com/en_US/before-you-begin/how-to-remove-the-battery-cover-from-blink-cameras
Posted by: malonetheried.blogspot.com
0 Response to "How Do I Change The Batteries In My Blink Camera"
Post a Comment